Certainly, ensuring the validation of user input holds utmost significance when it comes to the operation of dynamic websites. Inaccurate or improper user input can result in the occurrence of errors during the processing phase. Consequently, the verification of inputs becomes an absolute necessity. Remarkably, the PHP programming language boasts a plethora of pre-existing functions specifically designed to facilitate the validation of user inputs.
Exploring Request Methods for HTML Forms
When you embark on the journey of creating an HTML form, one of the crucial decisions you must make is choosing the appropriate HTTP method for your HTTP request. This decision can significantly impact how your data is transmitted and handled. Among the plethora of HTTP request methods available, the two most commonly employed for forms are GET and POST. Let’s delve into the details of each method to help you make an informed choice.
GET Method: Retrieving Data
The GET method is primarily designed for retrieving data from a resource. It offers several advantages and considerations:
- Data Transmission: GET sends data as key-value pairs appended to the URL. This transparent approach allows you to see the data directly in the address bar, which can be advantageous for debugging and sharing links;
- Security: While GET is less secure than POST, it’s important to note that it should never be used to send sensitive data such as passwords or confidential information. This method is more suitable for non-sensitive information retrieval;
- Speed: GET is faster compared to POST because it transfers data in the URL, making it a preferred choice for quick data retrieval;
- URL Variation: Different data sent through GET results in distinct URLs. This characteristic makes it easier to bookmark and share specific search queries or pages with preloaded data;
- Caching: GET requests can be cached in the browser, which can enhance the loading speed for frequently accessed resources. However, it’s worth mentioning that using random data, like timestamps, can bypass the cache and retrieve fresh data;
- Browser History: GET requests remain in the browser history, allowing users to revisit and share previously accessed pages easily;
- Limitations: GET does have limitations, such as a restriction to ASCII data and length limitations. Therefore, it may not be suitable for sending large or binary data.
POST Method: Sending Data Securely
On the other hand, the POST method is tailored for sending data to the server. Here’s what you need to know:
- Data Transmission: POST sends data within the body of the HTTP message, keeping it hidden from direct view in the URL. This makes it ideal for transmitting sensitive information;
- Security: POST is the preferred choice when sending sensitive data like passwords, credit card details, or emails through an HTTP request. It offers a higher level of security compared to GET;
- Speed: It’s important to note that POST is slightly slower than GET due to its data transmission method. However, the security benefits outweigh this minor drawback in most cases;
- URL Visibility: Unlike GET, POST requests do not display the transmitted data in the URL, enhancing security and privacy;
- No Length Limitations: POST has no inherent length limitations, making it suitable for sending large amounts of data or binary files;
- Data Versatility: You can use the POST method to send any kind of data, whether it’s text, images, files, or other formats.
In summary, choosing between GET and POST boils down to the nature of your data and your specific use case:
Use GET when you need to retrieve non-sensitive data quickly, want to take advantage of caching, and have relatively small data payloads.
Use POST when you are sending sensitive information, dealing with larger data payloads, or need to ensure data privacy and security.
By carefully considering these factors, you can select the most suitable HTTP method for your HTML forms, ensuring both efficient data transmission and data security.
Creating an HTML Form with POST Method and Action Script
When it comes to web development, HTML forms are an essential component that allows users to input data and interact with websites. In this section, we’ll guide you through the process of creating an HTML form with the POST method and a specified action script, which is commonly used for submitting data securely. Whether you’re building a contact form, a registration page, or any other interactive feature on your website, understanding how to create and process HTML forms is crucial.
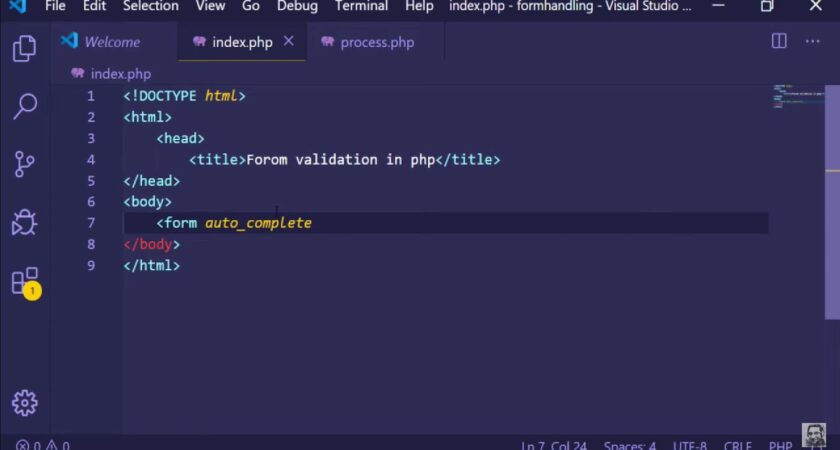
Step 1: Form Creation
To start, let’s create the HTML form itself. In this example, we’ve chosen the POST method, which is ideal for sending sensitive data like passwords or personal information, and specified the action script as “act.php.” The action script is where the form data will be sent for processing.
<form method="POST" action="act.php">
    <!-- Your form elements will go here -->
</form>
Here’s some additional information about the form elements:
- You can include various input fields within the form, such as text fields, radio buttons, checkboxes, and dropdown menus, depending on your requirements;
- The “method” attribute can also be set to “GET” or other HTTP methods, but we’ve opted for POST for enhanced security.
Step 2: Processing the Form Data
Once the user submits the form, the browser will send the data to the specified action script, “act.php” in our case. Now, let’s dive into the PHP script and see how it processes the incoming data.
<?php
if ($_SERVER['REQUEST_METHOD'] === 'POST') {
    // The request method is fine, and we can proceed with processing the data
    // Your data validation and processing logic goes here
} else {
    // If the request method is not POST, we exit with an error message
    exit('Invalid Request');
}
?>
In this PHP code, we first check if the incoming request method is indeed POST. This step is crucial for ensuring that the script only processes data when it’s received through the intended method.
Validating User Inputs to Prevent Errors
Ensuring that user inputs are properly validated is a crucial step in any web development process. Neglecting this step can lead to unpredictable errors and potential security vulnerabilities. Let’s delve into the techniques and best practices for validating user inputs effectively.
Checking User Inputs for Errors
Imagine you’re working with PHP code and need to assign a POST variable to a local variable, such as an email address. Here’s an example of how an error can occur:
$email = $_POST['email'];If the email variable is not set in the POST request, PHP will throw an error, which may look like this:
Undefined Index: Email
To prevent such errors, it’s essential to check whether the input variables are set before proceeding with any processing. Let’s explore how to do this for different types of inputs.
Handling Non-Boolean Inputs
When dealing with non-boolean inputs, the empty function in PHP becomes your ally. It checks whether the argument is empty or not and returns true in several cases, including:
An empty string ("")
0 as an integer
0.0 as a float
"0" as a string
NULL
FALSE
An empty array (array())
In this example, the $email variable is only declared if $_POST[’email’] is not empty, effectively preventing the “Undefined Index” error mentioned earlier. However, if the email input is mandatory for your application, you should consider throwing an error or displaying a user-friendly message if it remains empty. We will discuss this further in the later part of this tutorial.
Handling Boolean Inputs
For boolean inputs, it’s better to use the isset function because the empty function can return true even on false values. isset checks whether the variable is set (or declared) and not null. Here’s how to validate a boolean input:
if (!empty($_POST['email'])) {
    $email = $_POST['email'];
}
Using isset in this context ensures that the $boolean variable is assigned only if $_POST[‘boolean’] exists and is not null.
Securing Your Website from XSS Attacks: Validating User Inputs
When it comes to safeguarding your website against Cross-Site Scripting (XSS) attacks, it’s vital to ensure that user inputs are thoroughly validated and sanitized. XSS attacks occur when malicious users inject malicious scripts into web applications, which can then be executed by other unsuspecting users who access the same page. To prevent such security vulnerabilities and protect your users, follow these essential steps:
1. Input Validation: The First Line of Defense
Your first line of defense against XSS attacks begins with input validation. Ensure that any user-generated data is rigorously checked for potentially harmful content. Here’s how you can validate user inputs effectively:
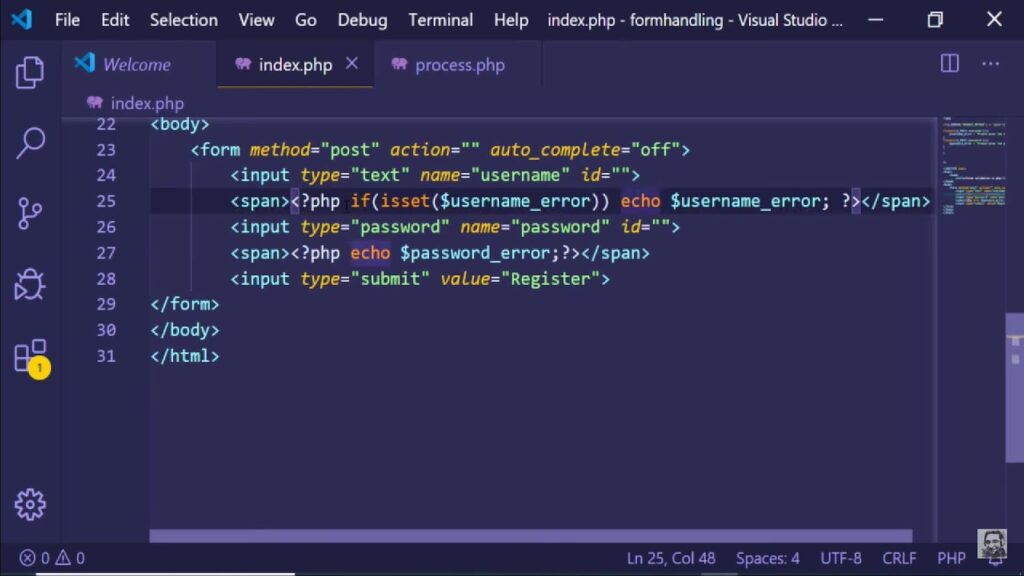
- Form Validation: When allowing users to submit information via forms, ensure that each field adheres to the expected data type and format (e.g., email addresses, phone numbers, and usernames). Implement server-side validation to cross-check inputs against predefined rules;
- Whitelist Accepted Characters: Specify a list of accepted characters for each input field, allowing only those characters to be submitted. Reject any input that contains characters outside the defined whitelist;
- Length Restrictions: Set limits on the length of user inputs to prevent excessively long data that could potentially disrupt your application or database;
- Regular Expressions: Employ regular expressions to validate complex data, such as email addresses or URLs, more accurately.
Here’s an example of input validation in PHP:
if (!empty($_POST['username']) && !empty($_POST['email'])) {
    $username = validateUsername($_POST['username']);
    $email = validateEmail($_POST['email']);
}

function validateUsername($input) {
    // Implement your username validation logic here
    return trim(htmlspecialchars($input));
}

function validateEmail($input) {
    // Implement your email validation logic here
    return trim(htmlspecialchars($input));
}
2. Sanitize User Inputs: Defending Against Malicious Code
Even with input validation in place, it’s crucial to sanitize user inputs to ensure that any potential threats are neutralized. Sanitization prepares user data for safe storage and display. Here are the key techniques to sanitize user inputs:
HTML Special Characters Escaping: Use the htmlspecialchars() function to escape HTML codes within user inputs. This transforms potentially malicious scripts into harmless text. For instance:
- Original Input: <script>location.href=’https://www.attacker.com'</script>
- Sanitized Input: <script>location.href=’https://www.attacker.com’</script>
Remove Extra Spaces: Extra spaces and padding in user inputs can lead to inefficiencies and database issues. Utilize the trim() function to eliminate leading and trailing spaces.
Here’s how you can sanitize and validate user inputs while addressing extra spaces:
if (!empty($_POST['username']) && !empty($_POST['email'])) {
    $username = sanitizeAndValidateUsername($_POST['username']);
    $email = sanitizeAndValidateEmail($_POST['email']);
}

function sanitizeAndValidateUsername($input) {
    $sanitizedInput = trim(htmlspecialchars($input));
    // Implement additional sanitation or validation if needed
    return $sanitizedInput;
}

function sanitizeAndValidateEmail($input) {
    $sanitizedInput = trim(htmlspecialchars($input));
    // Implement additional sanitation or validation if needed
    return $sanitizedInput;
}
Empowering Your Web Application: Creating a Robust Input Validation Class
Welcome to the world of secure and efficient web application development. In this guide, we’ll dive into creating a powerful input validation class that not only safeguards your application against Cross-Site Scripting (XSS) attacks but also ensures that the data you receive is reliable and sanitized. Even if you’re new to Object-Oriented Programming (OOP), we’ll walk you through the process step by step.
The Input Validation Class: Your Shield Against Threats
We’ve aptly named our class “Input” because it’s designed to handle all your input validation needs. In this section, we’ll explore the essential functions that make up this class, each serving a unique purpose.
1. check(): Ensure Data Completeness
The check() function allows you to verify whether the inputs are empty or not. It’s invaluable for ensuring that your application receives the necessary data to function correctly.
- Usage: Input::check($arr, $on = false);
- $arr: An array containing the names of the inputs you want to check;
- $on: An optional parameter representing the data source (e.g., $_REQUEST).
2. int(): Validate Integers
When dealing with numerical data, the int() function comes to the rescue. It ensures that a value is indeed an integer.
- Usage: Input::int($val);
- $val: The variable to be validated.
3. str(): Clean and Sanitize Strings
Strings often need cleaning to prevent malicious code injection. The str() function escapes HTML characters and trims the string for you.
- Usage: Input::str($val);
- $val: The string to be sanitized.
4. bool(): Convert to Boolean
Sometimes, you need to ensure that a variable is a boolean value. The bool() function easily handles this conversion.
- Usage: Input::bool($val);
- $val: The variable to be converted to boolean.
5. email(): Validate Email Addresses
Email validation is crucial for user registration and communication. The email() function ensures that an email address is valid.
- Usage: Input::email($val);
- $val: The email address to be validated.
6. url(): Validate URLs
Web applications often deal with URLs, and the url() function helps ensure they are valid and safe.
- Usage: Input::url($val);
- $val: The URL to be validated.
7. throwError(): Handle Errors Gracefully
Our class includes an error-handling mechanism to facilitate debugging. The throwError() function allows you to throw exceptions when errors occur.
- Usage: Input::throwError($error = ‘Error In Processing’, $errorCode = 0);
- $error: A custom error message;
- $errorCode: An optional error code for reference.
Implementation: Your Shield in Action
Now that you understand the functions that make up our Input Validation Class, let’s see how they come together in a full code example.
class Input {
	static $errors = true;

	// ... (All the functions as described above)

	static function throwError($error = 'Error In Processing', $errorCode = 0) {
		if (self::$errors === true) {
			throw new Exception($error, $errorCode);
		}
	}
}
Conclusion
In this tutorial, you have been guided through the process of inspecting and verifying user inputs, thereby fortifying your application against malicious XSS attacks. We delved into the intricacies of the filter_var() function, elucidating its various filters through illustrative examples. This tutorial has significantly enriched your expertise in validating a wide array of data types, such as emails, URLs, integers, and booleans, among others. As a concluding touch, we introduced a custom class to streamline the validation process, offering you the opportunity to further enhance its functionality in alignment with your specific requirements.
Should you harbor any inquiries or seek further clarification, do not hesitate to share your thoughts in the comment section below. Your readership is greatly appreciated.