AJAX, a web technology, enables the development of asynchronous web applications. It empowers web pages to establish discreet communication with the server, all while remaining in the background. This seamless interaction ensures that web pages can be dynamically refreshed without the need for complete reloading.
Within this informative guide, we will delve into the process of crafting a PHP script capable of managing an AJAX request and subsequently delivering a timely response to the client. This endeavor necessitates several essential tasks that the handler must execute proficiently.
Mastering Ajax Requests: A Comprehensive Guide
Are you ready to dive into the world of Ajax requests and unleash the power of dynamic web applications? In this guide, we will take you on a journey from the basics to advanced techniques, ensuring you have a firm grasp of this essential web development skill. We’ll assume you have a basic understanding of JavaScript and JSON, but don’t worry if you’re not an expert yet—we’ll walk you through the process step by step.
Creating an Ajax-Enabled Page
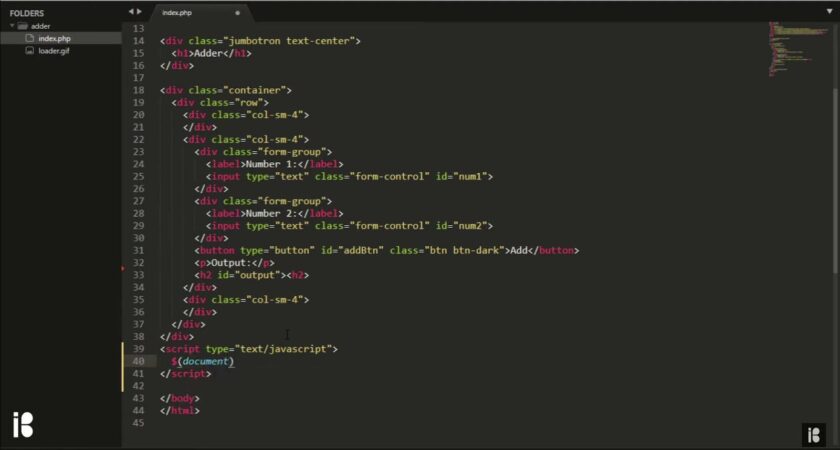
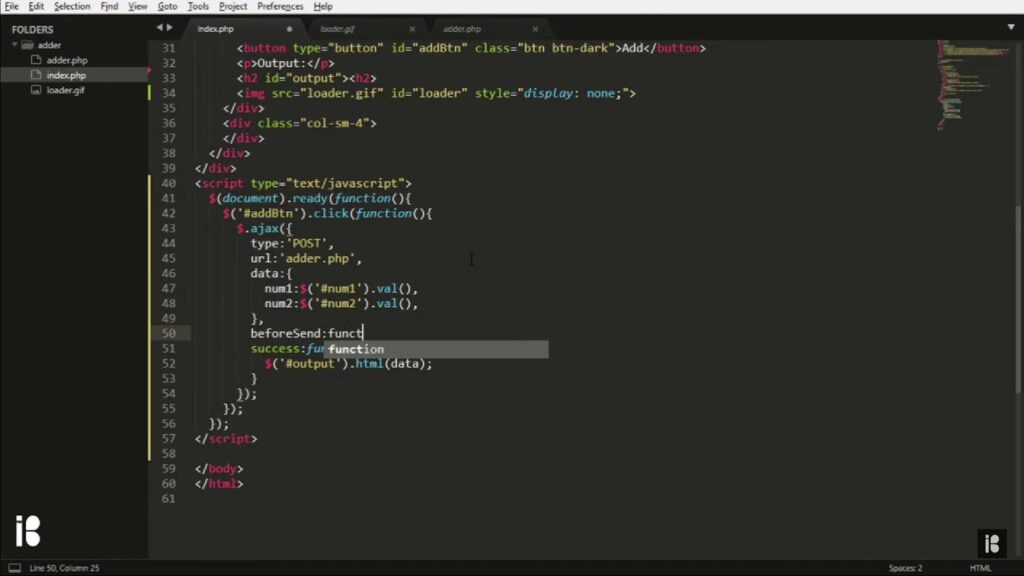
Let’s kickstart our Ajax adventure by creating a new HTML page, index.html, where we’ll implement the JavaScript code to send an Ajax request to the server with some data. In our example, we’ll stick with pure JavaScript, but feel free to use your preferred JavaScript library if you have one in mind. Here’s a breakdown of the code snippet:
<script type="text/javascript">
    var http = new XMLHttpRequest();
    var data = "username=" + name + '&email;=' + email;

    http.onreadystatechange = function() {
        if (this.readyState == 4 && this.status == 200) {
            // Handle the server's response here
        }
    }

    http.open('ajax.php', 'POST', true);
    http.send(data);
</script>
Demystifying the Code
Now, let’s dive deeper into each component of the code and expand on what’s happening:
- XMLHttpRequest Initialization: We start by initializing an XMLHttpRequest object. This object is the cornerstone of Ajax and allows us to make asynchronous requests to the server;
- Data Preparation: The data variable is where we assemble the data that will be sent to the server. In our example, we’ve constructed a URL-encoded string containing username and email parameters. If you opt for a library like jQuery, you can streamline this process by creating an object;
- onreadystatechange Event: We set the onreadystatechange method of the XMLHttpRequest object. This method defines a callback function that will be executed whenever the readyState of the request changes. We’ll use this function to handle the response from the server once it’s ready;
- Opening the Connection: Using the open method, we specify the type of request (POST in this case), the URL to which we’re sending the request (ajax.php), and whether the request should be asynchronous (true). This step prepares the request but doesn’t send it yet;
- Sending the Request: Finally, we use the send method to initiate the request to the server, along with the data we’ve prepared. At this point, the request is sent to the server, and we’re ready to handle the response when it arrives.
Creating the PHP Handler
To start building our Ajax functionality, we need to create a PHP handler that will manage incoming Ajax requests. This handler, which we’ll name handler.php, plays a pivotal role in processing and responding to Ajax calls. But wait, when you open this file, it’s surprisingly empty – don’t worry, we’re going to fill it with essential code in the upcoming steps!
Include Necessary Files
In our journey towards crafting a robust Ajax system, the next step involves including some crucial files in our handler.php. These files serve specific purposes and are vital for the functionality of your Ajax-powered application. Here’s a breakdown of what you need to do:
- Autoload File:
- An “autoload” file, such as autoload.php, is included to efficiently load class files when needed. This keeps your code organized and ensures that classes are available when called;
- Tip: Consider following an autoloading tutorial if you’re new to this concept, as it can significantly improve your PHP project’s structure.
- Database Connection File:
- Another essential inclusion is the database connection file (db.php in this case). This file establishes a connection to your database, a fundamental requirement for many Ajax operations.
Remember, the specific files you include can vary based on your project’s requirements. In our example, we’ve added these two files to demonstrate the process, but adapt it as needed for your application.
<?php
include_once $_SERVER['DOCUMENT_ROOT'] . '/inc/autoload.php';
include_once $_SERVER['DOCUMENT_ROOT'] . '/inc/db.php';
Now, let’s address an important point!
Understanding JSON in Ajax:
Historically, Ajax interactions primarily utilized XML (Extensible Markup Language) for data exchange. However, in today’s development landscape, JSON (JavaScript Object Notation) has become the go-to choice for its lightweight and simplicity. Here are some insights into JSON handling in PHP for Ajax operations:
json_encode and json_decode: PHP provides two essential functions for working with JSON objects: json_encode and json_decode. These functions allow you to convert data between PHP arrays and JSON format seamlessly. If you’re new to these functions, don’t worry – they are straightforward to grasp and will be indispensable in your Ajax journey.
Setting the Response Format:
When the server sends a response to the browser in JSON format, it’s imperative to inform the browser about it. You achieve this by setting the response header.
In every PHP script that handles Ajax requests, include the following line to specify that the response is in JSON format:
header(‘Content-type: application/json’);
Streamlining with Includes:
Adding the header code to every script can become tedious. To optimize your workflow, create a separate file named ajax.inc.php to consolidate common code and includes.
This file not only houses the content-type header but can also include other essential files as needed.
<?php
header('Content-type: application/json');
// Include any other necessary scripts here (optional)
include_once $_SERVER['DOCUMENT_ROOT'] . '/inc/autoload.php';
include_once $_SERVER['DOCUMENT_ROOT'] . '/inc/db.php';
By adopting this approach, you’ll only need to include ajax.inc.php in your Ajax handlers, reducing redundancy and simplifying maintenance.
Now, returning to our handler.php, it will resemble the following:
<?php
include_once $_SERVER['DOCUMENT_ROOT'] . '/inc/ajax.inc.php'; // Include ajax.inc.php
With these foundational steps in place, you’re well on your way to creating a robust and efficient PHP handler for your Ajax-powered application. The groundwork we’ve laid here ensures smoother development and maintenance down the road.
Handling Errors: Enhancing Error Handling in Ajax Scripts
Error handling is a critical aspect of creating robust and reliable web applications, and it plays a pivotal role in Ajax Handlers. In this comprehensive guide, we’ll explore effective ways to implement error handling to ensure a seamless user experience. While various approaches exist, we’ll focus on the tried-and-true method of using the try-catch model in PHP for its simplicity and efficiency.
Implementing Error Handling with Try-Catch in PHP
- Include Necessary Files: Before diving into error handling, make sure to include the essential files at the beginning of your script. This ensures that all required components are available for your error-handling process;
- Wrap Your Code in a Try Block: Enclose the PHP code that you want to monitor for errors within a try block. This allows you to catch exceptions when they occur during script execution.
try {
    // Your code here
} catch(Exception $e) {
    // Handle errors here
}
Throwing Exceptions: Inside the try block, you can use the throw new Exception statement to raise an error condition. This statement allows you to specify an error message and an optional error code.
try {
    throw new Exception('Something Went Wrong', 512);
} catch(Exception $e) {
    // Handle the error here
}
Responding to Errors
After catching the thrown error, you can take various actions to respond effectively:
- Return JSON Response: To provide immediate feedback to the client or browser, you can encode error information in a JSON response. This response can include;
- status: Set to false to indicate that an error occurred;
- error: Contains the error message retrieved from the thrown exception;
- error_code: Optionally, include an error code to further categorize errors for debugging and organization.
try {
    throw new Exception('Something Went Wrong', 512);
} catch(Exception $e) {
    echo json_encode([
        'status' => false,
        'error' => $e->getMessage(),
        'error_code' => $e->getCode()
    ]);
    // Perform additional tasks if needed, like MySQL rollbacks
    exit;
}
Exiting the Script: To prevent further execution of the script after handling the error, use the exit statement. This is especially useful to avoid unexpected behavior or data corruption.
Why Exit After Handling Errors?
You might wonder why it’s necessary to exit the script immediately after encountering an error. Exiting the script is crucial for several reasons:
- Preventing cascading errors;
- Avoiding corrupted data or incomplete operations;
- Ensuring a clean response to the client or browser;
- Maintaining application stability and reliability.
Now that you have a solid foundation in error handling with try-catch in PHP, let’s explore some practical examples of when and how to use this approach in Ajax scripts.
Examples of Error Handling in Ajax Scripts
Handling Database Query Errors:
$result = $mysqli->query("UPDATE users SET username = $username");

if ($result === false) {
    throw new Exception('DB Query Failed', 202);
}
Handling Invalid Input:
if (empty($_POST['email'])) {
    throw new Exception('Invalid Input', 200);
} else {
    $email = $_POST['email'];
}
These examples demonstrate situations where throwing exceptions is essential to ensure the proper functioning of your Ajax scripts.
Finishing the Handler.php Script
To conclude, here’s an example of how to use error handling in a complete handler.php script:
include_once $_SERVER['DOCUMENT_ROOT'] . '/inc/ajax.inc.php';

try {
    if ($_SERVER['REQUEST_METHOD'] !== "POST") {
        throw new Exception('Invalid Request', 2000);
    } else {
        // Return a successful JSON response if everything is fine
        exit(json_encode(['status' => true]));
    }
} catch(Exception $e) {
    // Handle errors and provide an appropriate JSON response
    echo json_encode([
        'status' => false,
        'error' => $e->getMessage(),
        'error_code' => $e->getCode()
    ]);
    exit;
}
By following these guidelines, you can effectively handle errors in your Ajax scripts, ensuring a smoother and more reliable user experience. Read about the fascinating world of escape sequences in PHP! Discover their secrets and enhance your coding skills effortlessly.
Completing the Front-End: Enhancing JavaScript Code for Smooth Data Retrieval
Let’s dive into our JavaScript code and give it a well-deserved makeover. By the end of this transformation, your index.html file will shine with a more refined and efficient script. We’ll be focusing on the script’s readability, error handling, and user experience.
1. Improved JSON Parsing with jsonParse() Function
In the snippet below, we’ve revamped the JSON parsing process with an enhanced jsonParse() function. This function not only parses JSON but also includes built-in error handling, ensuring a smoother execution of your code.
<script type="text/javascript">
    function jsonParse(text) {
        try {
            var json = JSON.parse(text);
        }
        catch(e) {
            console.error('Error parsing JSON:', e);
            return null;
        }
        return json;
    }
</script>
What’s New:
- The jsonParse() function now accepts a text parameter, making it more versatile;
- We’ve added a console.error statement to log any parsing errors, providing valuable insights for debugging;
- In case of a parsing error, the function returns null instead of false for consistency and clarity.
2. Handling XMLHttpRequest Responsibly
The XMLHttpRequest has been enhanced to ensure robust data retrieval. The updated code snippet below demonstrates best practices for handling asynchronous requests.
<script type="text/javascript">
    var http = new XMLHttpRequest();
    var data = "username=" + name + '&email;=' + email;

    http.onreadystatechange = function() {
        if (this.readyState == 4) {
            if (this.status == 200) {
                var jsonResponse = jsonParse(this.responseText);

                if (jsonResponse && jsonResponse.status === true) {
                    alert('Everything is Fine!');
                } else {
                    console.error(jsonResponse ? jsonResponse.error : 'Something Bad Happened');
                    // You can also update the DOM to display the error to the user.
                }
            } else {
                console.error('HTTP Error:', this.status);
                // Handle HTTP error cases here.
            }
        }
    }

    http.open('POST', 'ajax.php', true);
    http.setRequestHeader('Content-Type', 'application/x-www-form-urlencoded');
    http.send(data);
</script>
What’s New:
- We’ve included additional error handling for HTTP status codes other than 200. Now, you can address potential network issues or server errors more effectively;
- Improved the readability of the success condition by introducing jsonResponse to hold the parsed response data;
- Added a setRequestHeader method to specify the content type of your request.
3. User-Friendly Error Handling
Enhancing the user experience is crucial. Here’s how you can make error messages more informative and user-friendly:
<script type="text/javascript">
    // Inside the onreadystatechange function
    if (!jsonResponse || !jsonResponse.status) {
        var errorMessage = jsonResponse ? jsonResponse.error : 'Something Bad Happened';
        displayError(errorMessage);
    }

    function displayError(message) {
        // You can update the DOM to show the error message to the user.
        var errorElement = document.getElementById('error-message');
        errorElement.innerText = message;
        errorElement.style.display = 'block';
    }
</script>
What’s New:
- We’ve introduced a displayError() function to handle error messages in a user-friendly way;
- The error message is displayed to the user by updating a DOM element with the id ‘error-message.’
Conclusion
Ajax stands as the ultimate and widely embraced method for fashioning a dynamic website. Acquiring expertise in formulating a PHP handler tailored for Ajax solicitations is deemed indispensable for those ensconced in the realm of PHP development. Our comprehensive exposition on the subject entails illustrative instances. Should any queries beckon your curiosity, please don’t hesitate to share your thoughts in the comment section below.